What to Do When a Wafer Handling Robot Drops a Wafer
Author
Date Published
Reading Time
What should I do if a wafer handling robot drops a wafer? First, follow your facility’s safety and equipment procedures: stop the affected operation, secure the area, and notify the responsible team.
A dropped wafer can create contamination, damage nearby components, or signal a handling fault that affects subsequent lots. Containment should come before recovery or restart.
This guide outlines how to assess the wafer and equipment, investigate possible causes, and determine when the tool is ready to return to production.
What Should You Do Immediately After a Wafer Is Dropped?
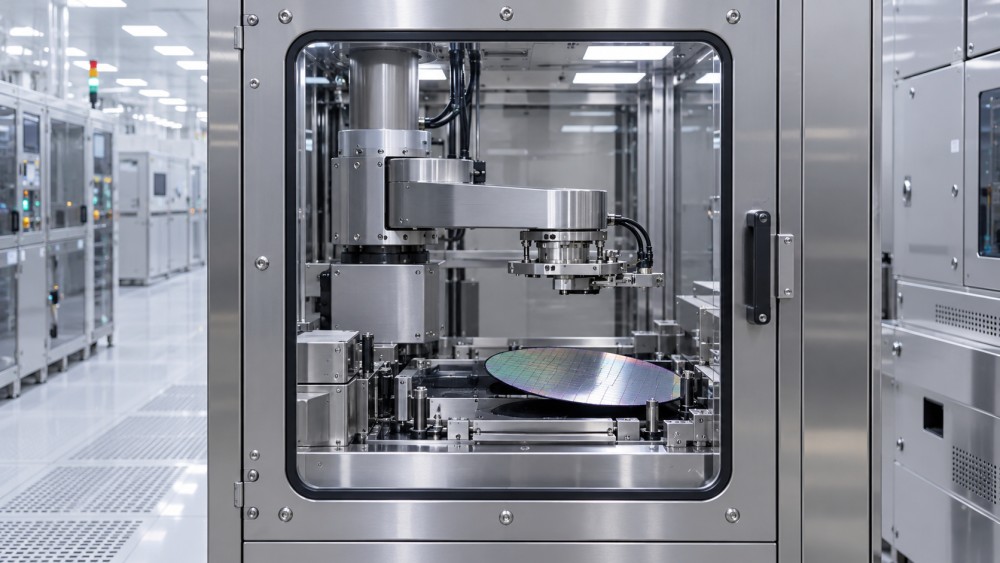
Stop the affected operation using the facility-approved method. Do not assume that an emergency stop, a software pause, or opening an enclosure is appropriate in every situation.
Keep personnel clear of the affected area and notify the responsible operations, equipment, and safety teams. Escalate immediately if there is an injury or suspected hazardous exposure.
Do not reach into the tool, move the robot manually, or attempt to retrieve the wafer until authorized personnel have assessed the equipment state and hazards.
Preserve the tool display, alarm information, and relevant event times when it is safe to do so. Avoid clearing alarms or cycling power prematurely.
Identify potentially affected wafers, carriers, and lots using the available tracking system. Place them on hold according to site procedures while their locations and processing histories are verified.
If the wafer is broken, treat fragments and nearby surfaces as potential contamination sources. Avoid disturbing debris until the approved recovery and cleaning approach is established.
Is It Safe to Open the Tool or Recover the Wafer?
Not necessarily. A stopped robot can still have stored energy, an unexpected motion path, hot surfaces, electrical hazards, vacuum conditions, or process residues inside the equipment.
Access must follow the facility’s hazard assessment, equipment manufacturer instructions, and applicable energy-control procedures. Only trained, authorized personnel should perform recovery or maintenance.
Depending on the tool and process, the assessment may need to address electrical, pneumatic, mechanical, thermal, chemical, and vacuum hazards before anyone opens an enclosure.
For equipment exposed to hazardous process materials, involve environmental health and safety personnel when required. A wafer’s appearance alone does not establish that it is safe to handle.
Use the approved personal protective equipment, cleanroom garments, retrieval tools, and waste containers for the specific equipment and material. Follow site procedures for fragments and contaminated waste.
Do not improvise with tweezers, adhesive tape, compressed air, or a vacuum cleaner. An unsuitable method can spread particles, damage components, or introduce additional hazards.
If the wafer cannot be located, remains under a robot arm, or is inside a process module, maintain the hold and consult the equipment owner or manufacturer.
Which Wafers and Lots Should Be Placed on Hold?
Start with the dropped wafer and its lot, then assess other material that may have shared the affected transfer path, carrier, chamber, or time window.
The hold scope depends on evidence. Consider when the fault began, whether position tracking remained reliable, and whether debris could have reached adjacent wafers or modules.
Check the manufacturing execution system against equipment logs and physical carrier contents. A robot error can leave software records inconsistent with the actual location of material.
Include wafers transferred immediately before the alarm when the failure mechanism or onset is uncertain. The process and quality teams can narrow the scope as evidence improves.
Do not release a lot simply because no visible damage appears on its carrier. Particle exposure, edge damage, and identity errors may require additional checks.
Record the lot numbers, wafer identifiers where available, carrier IDs, tool and chamber identifiers, and the estimated incident time. Flag any missing or uncertain information.
If material has already moved downstream, notify the receiving area promptly. Site traceability procedures should determine whether downstream equipment or related lots also need review.
Can the Dropped Wafer Be Recovered or Reprocessed?
A dropped wafer is not automatically scrap, but it should not return to production based only on a visual inspection. Its disposition requires an authorized evaluation.
Relevant factors include the product’s process stage, customer requirements, contact surfaces, suspected contamination, visible damage, and the availability of suitable inspection or rework methods.
Edge chips, cracks, and fragments are particularly important because a damaged wafer can break during later handling or introduce particles into other equipment.
An intact wafer may still have backside contamination, surface defects, or damage outside the capability of a quick visual check. Use the inspection methods specified for the product.
Where identity is uncertain, resolve it through approved traceability procedures before processing continues. Do not infer a wafer’s identity solely from its apparent position.
Possible outcomes include inspection and release, approved rework, engineering analysis, or scrap. The process owner and quality organization should make the final disposition under site rules.
Document the decision and its basis, including inspection results and any customer-specific constraints. Retain the incident link so later yield analysis can identify affected material.
What Should Be Checked on the Robot and Transfer Path?
Once access is authorized and hazards are controlled, inspect the complete path involved in the transfer, not just the location where the wafer came to rest.
Check the end effector, contact points, edge supports, and any pads for damage, wear, contamination, or material left behind. Use the manufacturer’s inspection criteria.
Examine accessible load ports, aligners, carrier slots, chamber interfaces, and nearby surfaces for fragments, abnormal contact marks, or displaced components that could affect subsequent transfers.
Confirm whether the robot’s reported position and wafer-presence status agree with physical observations. A mismatch may point to a sensing, mapping, software, or positioning problem.
For systems that use vacuum or another holding mechanism, inspect the relevant supply, connections, sensors, and alarms according to the equipment configuration and service instructions.
Review recent maintenance, part replacements, calibration changes, software updates, and unusual alarms. An apparently isolated drop may follow a change that also affects other tools.
Avoid adjusting robot alignment merely to make a test pass. First identify the failed condition, preserve evidence, and use the approved calibration and verification procedure.
Cleaning and component replacement should follow documented site and manufacturer requirements. Record what was removed, cleaned, replaced, or adjusted so the subsequent investigation remains traceable.
Why Do Wafer Handling Robots Drop Wafers?
There is no single default cause. Investigators should compare the event sequence with the actual transfer configuration instead of assuming the robot arm itself failed.
Holding problems may involve a worn contact surface, an unsuitable end effector, or inadequate vacuum where vacuum is used. The applicable checks depend on the tool design.
Positioning problems may arise from incorrect teaching, mechanical movement, calibration drift, or interference at a carrier, aligner, or chamber interface. Logs and inspection can help distinguish them.
Detection errors can occur when wafer-presence sensors, carrier mapping, or position information do not reflect the physical state. Investigate whether the tool acted on incorrect information.
Material and configuration differences matter too. Wafer diameter, thickness, bow, edge condition, carrier type, and backside condition can affect handling within a tool’s qualified operating range.
Review whether the affected recipe and hardware were approved for that wafer and carrier combination. A configuration mismatch may not be apparent from a general equipment specification.
External factors can also contribute, including a damaged carrier, an improperly seated cassette, recent maintenance, or contamination at a contact point. Avoid assigning responsibility before evidence is reviewed.
Build a timeline from equipment logs, operator observations, maintenance records, and physical findings. Separate confirmed facts from hypotheses, and document what evidence would test each hypothesis.
How Do You Clean and Verify the Affected Equipment?
The cleaning scope should reflect where the wafer traveled, where fragments or particles may have spread, and which surfaces can contact subsequent production material.
Use the approved recovery and cleaning procedure for each affected component. Some parts may require removal, replacement, specialized cleaning, or further evaluation rather than in-place wiping.
Track fragments when practical, but do not treat an apparent fragment count as proof that every particle has been recovered. Inspection capability and access have limits.
After cleaning, authorized personnel should inspect the transfer path and verify that protective covers, sensors, connections, and other disturbed components are restored to their required state.
Where site procedures require it, perform particle, surface, or other contamination checks appropriate to the affected module and process. Record the method and acceptance limits.
If checks fail or the contamination boundary remains uncertain, expand the investigation or cleaning scope under the site’s escalation process. Do not bypass failed criteria to restore capacity.
Coordinate with the equipment supplier when internal procedures do not cover the failure, parts are damaged, or the tool cannot meet its specified verification conditions.
When Is the Tool Ready to Return to Production?
Return to production is a controlled decision, not merely a successful robot reset. The responsible teams should verify both equipment function and material risk.
First, confirm that the wafer and any known fragments have been addressed, hazards are controlled, and the affected area has passed the required inspection and cleaning checks.
Next, complete documented repairs, sensor checks, calibration, and interlock verification as applicable. Any outstanding uncertainty should be assessed against the facility’s release criteria.
Run the approved functional and transfer tests using suitable test material and carrier configurations. Test conditions should represent the affected transfer path and relevant operating range.
A single successful movement does not necessarily establish sustained performance. The number and type of verification cycles should follow site procedures, equipment guidance, and incident severity.
Where required, complete monitor wafer, particle, process, or other qualification checks before releasing production lots. Compare results with predefined limits and document any deviations.
Obtain the required approvals from equipment, process, quality, and safety owners. Record restrictions, monitoring requirements, and the responsible person for follow-up after restart.
If the cause remains unconfirmed, release only under an approved risk assessment with defined controls. Some facilities or products may require the cause to be established first.
How Can Teams Reduce the Risk of Another Drop?
Turn the investigation into specific corrective actions with owners and due dates. Distinguish immediate containment from changes intended to prevent recurrence across similar tools.
Review preventive maintenance intervals and replacement criteria for handling components against actual wear and failure history. Do not assume a schedule from another tool is directly applicable.
Check that new wafer types, carrier designs, and recipe changes receive handling qualification before production use. Include relevant edge conditions and the intended transfer interfaces.
Trend drops, near misses, wafer-presence errors, mapping faults, and particle excursions by tool and configuration. Repeated minor alarms can justify investigation before another wafer is lost.
For supplier discussions, request documented handling limits, verification procedures, service support, replacement-part availability, and evidence applicable to the site’s wafer and carrier configurations.
Measure the business impact using the actual affected lots, recovery labor, downtime, qualification work, and scrap. Keep estimated losses separate from confirmed costs and yield results.
Conclusion
When a wafer handling robot drops a wafer, the priority is to stop and secure the operation, notify the right teams, and protect potentially affected material.
Recover the wafer only after an authorized hazard assessment, investigate both the transfer path and equipment records, and make wafer disposition through documented quality procedures.
Return the tool to production only when required cleaning, repairs, functional tests, qualification checks, and approvals are complete. Treat unresolved uncertainty as a managed risk, not a reset alarm.
Questions about market trends? Contact Market Scope Live for deeper business insights.
We respect your privacy. Your information is strictly confidential.
We respect your privacy. Your information is strictly confidential.
Related News
 Wafer Fab EquipmentHow to size semiconductor manufacturing equipment for wafer fabsSize semiconductor manufacturing equipment for wafer fabs with confidence. Learn to model capacity, assess bottlenecks, and make smarter procurement decisions.MORE+
 Wafer Fab EquipmentWhen should semiconductor manufacturing equipment maintenance be scheduled?Semiconductor manufacturing equipment maintenance should follow approved time, usage, and condition limits. Learn how to schedule service and protect production.MORE+
 Wafer Fab EquipmentWhen should chemical vapor deposition equipment be cleaned?Chemical Vapor Deposition Equipment cleaning depends on buildup, defect trends and validated limits. Learn when to act to protect wafer quality and uptime.MORE+
 Wafer Fab EquipmentHow residual gas analyzers help detect vacuum chamber leaksResidual Gas Analyzers help detect vacuum chamber leaks. Explore gas signatures, tracer testing, and practical steps to pinpoint problems with confidence.MORE+
 Wafer Fab EquipmentHow to Test Material Handling Recovery After a Power OutageHow can I test material handling recovery after a power outage? Explore a practical guide to verifying carrier locations, safe transfers, and system readiness.MORE+
 Wafer Fab EquipmentWhat to Do When a Wafer Handling Robot Drops a WaferWhat should I do if a wafer handling robot drops a wafer? Learn how to contain risks, protect affected lots, investigate the cause, and safely restart production.MORE+
 Wafer Fab EquipmentDoes a PVD Tool Need a Dedicated Cooling Water Supply?Does a PVD tool need a dedicated cooling water supply? Discover when shared cooling works, when a chiller is needed, and what to check before installation.MORE+
 Wafer Fab EquipmentRapid thermal processing or batch furnaces for wafer annealing?Semiconductor Thermal Processing Equipment: Compare RTP and batch furnaces for wafer annealing to find the right fit for your process, throughput and yield goals.MORE+
 Wafer Fab EquipmentPreventing moisture contamination in semiconductor gas delivery systemsSemiconductor Gas Delivery Systems need effective moisture control. Discover practical design, monitoring, and maintenance strategies to protect gas purity.MORE+